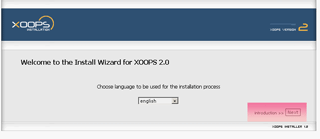
| In the address bar, enter this url:
http://YOUR_SERVER_IP/xoops/html/install/index.php,
and you should see this screen. Click next to continue.
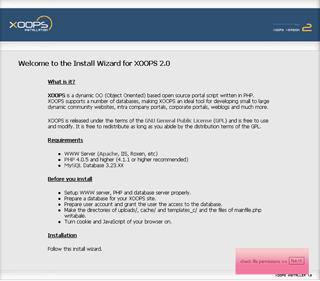
Click next.
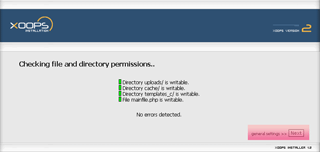
Click next (If you see 4 green lights here, then you pass the checking.)
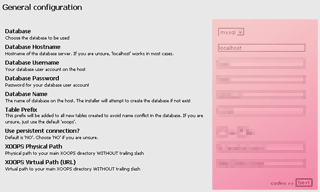
Click next. You must correctly input information for all the fields as necessary (For example: database: mysql; database hostname: localhost; username: root; password: ; database name: xoops (user must have create db permission)).
Click next. Confirm your information here.
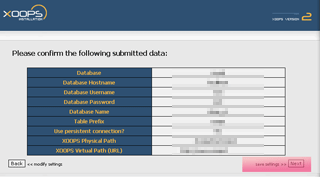
Click next.
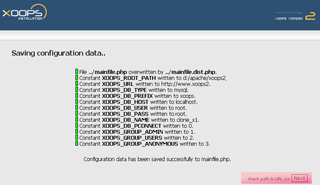
Click next. Remember your site url carefully here.
Click next.
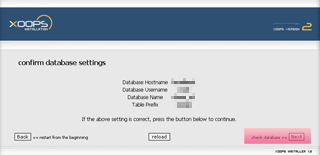
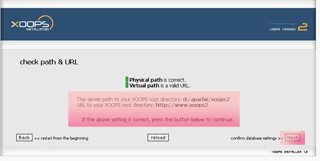
Click next. Confirming database existence.
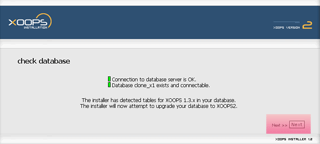
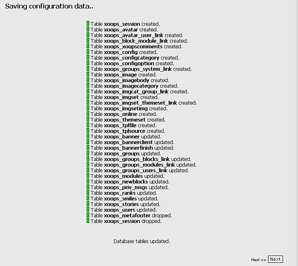
Click next.
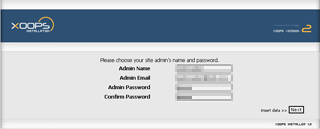
Click next. Here is the important part. You need to choose your admin login/pass.
Click next. When you are done, you can visit your own xoops portal site.
|


